
“Help, my prints are too dark, how do I correct my printer?”
This is a question I hear every so often. My response is usually, “what makes you think it is the printer that is too dark (or light)?” Their reply is almost always the same, “because the print is darker (or lighter) than the monitor.”
My typical answer to that is “do a reprint from the last time it printed correctly.” The prints are almost 100% of the time the same density as last time. That is how you know, there is nothing wrong with the printer – it is an exposure issue.
The color and the density of your prints are intertwined.
I am copying this from my blog post, The Colour of Money, because you can’t compare the color or density of your print to the color on your monitor unless you calibrate your monitor regularly.
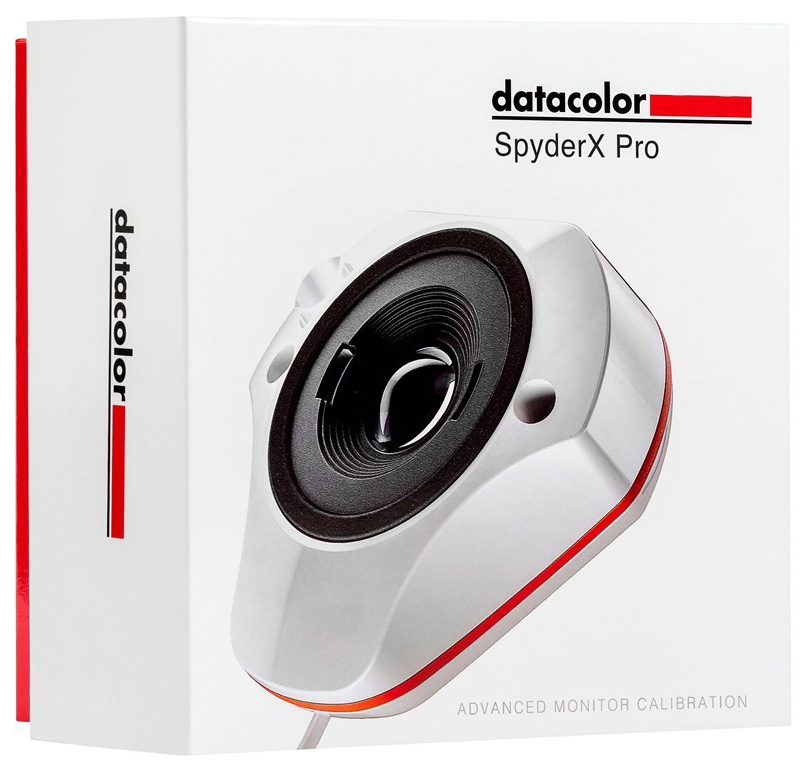 “But it looks good on the monitor!” What makes you think your $100 monitor is more accurate than your $800 printer? Maybe it is, maybe not. If you calibrate your monitor then you can possibly trust your monitor. What is monitor calibration? The best way is a calibrator like a SpyderX. It is worth the money if density accuracy is important to you.
What is my point? Density (AKA, lightness or darkness of a photo) is more frequently an exposure issue. It can be caused by several things:
- Your light(s) are closer or further away from the subject than usual.
- Your light(s) are not set to the correct power.
- You camera is not set correctly; ISO, shutter speed and/or f-stop may be wrong.
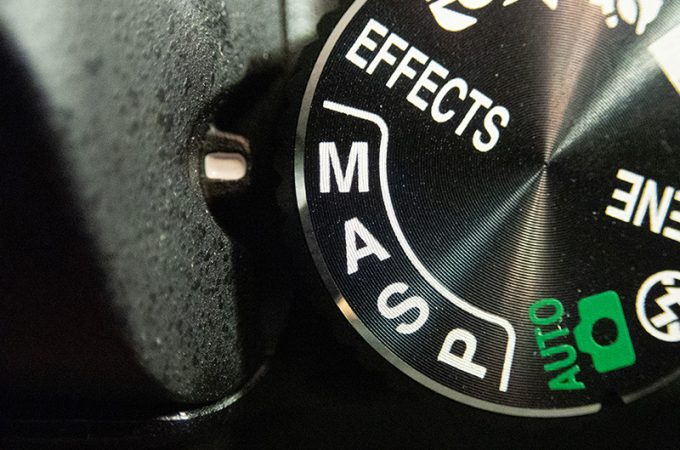
In order to make changes to you exposure your camera must be set to Manual Exposure Mode, M
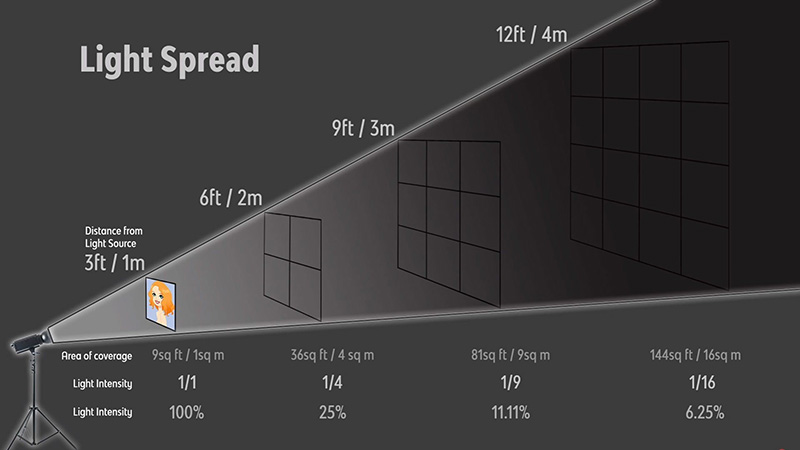 Distance from light to subject can vary depending on how much space you have at the location. If you have a small amount of space, the light will be closer. If the exposure is set the same as last time, the photos with be too light and look blown out. The fix this, turn your light’s power down.
If the flash is further away the photos will be darker if the exposure is not changed (light fall off, also known as the inverse square law). The fix? -turn your light’s power up.
In general, this is Photography Exposure 101.
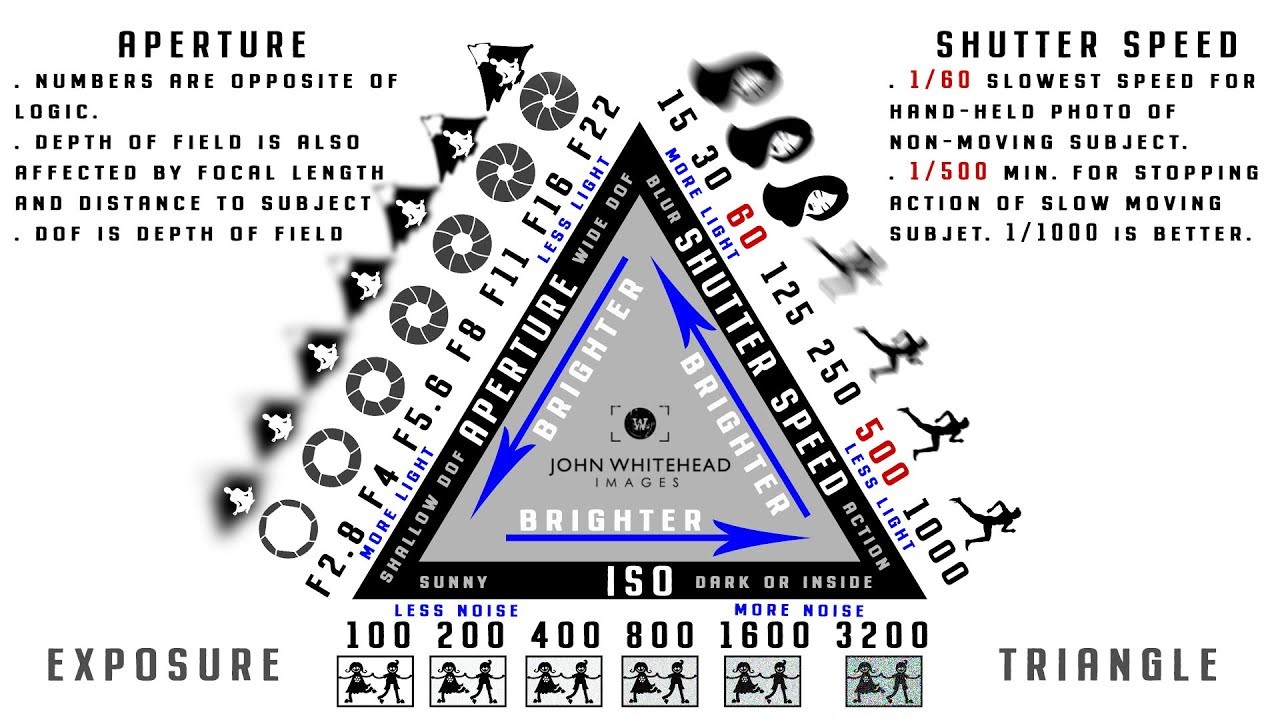
ISO, a higher ISO makes the photos lighter, a lower ISO makes the photos darker.
f-stop (also known as aperture) 1, 1.4, 2, 2.8, 4, 5.6, 8, 11, 16, 22, etc. is either half of double the exposure of the previous number. If your photos are too dark go down on the f-stop (ie f-5.6 to f-4), if the photos are too light, go up on the f-stop, (ie f-8 to f-11).
Shutter speed. If you are using flash, shutter speed does not really affect exposure unless you go too high or too low. Stay between 1/60 to 1/160 second and you will be fine. If you are using a constant light source, then shutter matters a lot. Be careful going too low, you can have blurry photos. Too high, over about 1/200 second is unnecessary and can make exposure too dark.
I hope you find this helpful and if you have any questions, give me a shout at 214-342-9290.
0 Comments